Video on Lane Codes
What Is a Lane Code?
A Lane Code is an internal or customer-specific identifier for a regular route. Each saved lane stores:
- Origin and destination details
- Distance
- Default rate
- Optional lane code for internal tracking or customer invoicing
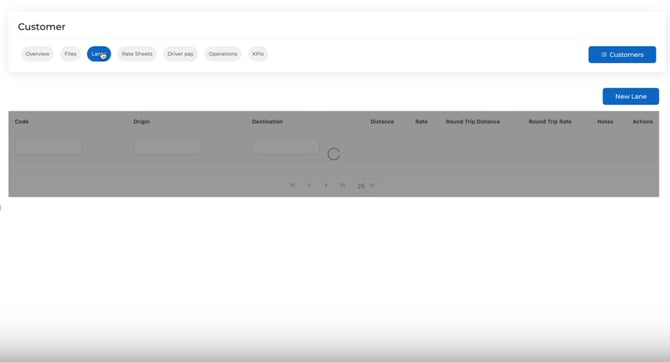
How to Create Saved Lanes with Lane Codes
- Go to Customers
Navigate to the customer profile (e.g. FedEx). - Open the ‘Lanes’ Tab
Click the Lanes tab → New Lane.
- Enter Lane Details:
- Origin and Destination addresses
- Distance
- Default rate
- Lane Code
Use if the customer has a specific identifier for this route (e.g. “NYC-LAX-001”).
- Origin and Destination addresses

Using Saved Lanes in Dispatch
When creating a load for that customer:
- Go to Dispatch > New Load
- Select the Customer
- In Step 1, you'll see a section called Customer Lanes.

- Pick from the dropdown list of saved lanes.
Note: Typing the lane code manually will not auto-fill route data. You must select from the dropdown.

Once selected, the system will:
- Auto-fill the shipper and receiver info


- Pull in the saved rate
- Reduce repetitive entry
Where Does the Lane Code Appear?
If a lane code is assigned, it will:
- Be visible in the load details
- Appear on the invoice for that load (helpful for customer references)

When Should I Use Lane Codes?
Use lane codes if:
- Your customer has their own internal lane identifiers
- You want to standardize routing entries
- You need the lane info to show up on invoices for billing purposes
For any questions or support, reach out to us at help@truckpedia.io